How to use supports in 3D slicer software
1. Understanding Support Structures
When designing a 3D print, it is important to know How to use supports in 3D slicer software. Support structures often make the difference between a flawless model and a failed print. Supports act as temporary scaffolding, allowing overhanging features to print successfully without sagging or collapsing. Here’s what you need to know:
Why Supports Are Necessary
3D printing is constrained by layer-by-layer deposition, meaning every new layer needs a solid base. Without supports, overhangs beyond a certain angle (typically 45 degrees) can lead to messy, inconsistent results. Key scenarios requiring supports include:
- Bridges—horizontal spans with no underlying material.
- Complex geometries—such as organic shapes or internal cavities.
- Detailed overhangs—fine details that extend outward.
Types of Support Structures
Different slicers offer multiple support styles, each suited to specific applications:
- Standard (Grid) Supports—Dense, uniform structures offering maximum stability.
- Tree Supports—Branch-like pillars that minimize material usage and improve removability.
- Organic Supports—Adaptive structures used in high-end slicers for optimized distribution.
How Slicers Generate Supports
Leading slicers like PrusaSlicer, Cura, and Bambu Studio use algorithms to detect unsupported features and place supports accordingly. Key factors influencing generation include:
- Support angle threshold—Determining which overhangs require support.
- Support placement strategy—Everywhere vs. touching build plate options.
- Adaptive supports—Smart distribution to reduce material waste and ease removal.
This foundational knowledge sets the stage for optimizing support settings, ensuring efficient, hassle-free printing.
2. Optimizing Support Settings for Success
Generating supports is just the first step—optimizing their settings ensures they are effective, easy to remove, and minimize material waste. Fine-tuning these parameters can drastically improve print quality.
Key Parameters to Adjust
Every slicer offers detailed settings to refine how supports behave:
- Support density—Higher density creates stronger supports but is harder to remove. Lower density saves material but may compromise stability.
- Z-distance (Support Gap)—Defines the space between the support and model; too close makes removal difficult, too far risks poor bridging.
- Support interface layers—A thin intermediate layer that prevents supports from bonding too tightly to the model, enhancing ease of removal.
Customizing Supports for Efficiency
Beyond default slicer-generated supports, manual customization enhances results:
- Modifier meshes—Targeted supports for specific areas, avoiding unnecessary structures.
- Adaptive support angles—Variable density based on overhang severity—use denser supports where needed and sparse supports elsewhere.
- Bridging gaps in supports—Strategic placement of gaps improves airflow, allowing better print surfaces.
Filament-Specific Considerations
Different filaments react uniquely to support structures, requiring adjustments:
- PETG—Tends to string between supports; increasing Z-gap improves detachment.
- PLA—Standard settings usually work well but tweaking interface layers improves finish.
- Flexible filaments (TPU)—Needs larger support gaps to prevent bonding too strongly.
Dialing in these settings ensures that supports do their job effectively while avoiding unnecessary post-processing headaches.
3. Post-Processing: Removing and Refining Supports
Once a print is complete, removing supports cleanly ensures a polished final product. The right techniques can minimize marks and improve overall surface finish.
Best Removal Techniques
Different methods work best depending on the support style and filament type:
- Precision tools—Flush cutters, craft knives, and needle-nose pliers allow careful removal without damaging the print.
- Temperature adjustments—Heating the supports slightly can make them more brittle, easing separation.
- Peeling vs. cutting—Tree supports can often be peeled away, while dense grid supports require strategic cutting.
Improving Surface Finish
Even with optimized support settings, post-processing helps refine the print’s appearance:
- Sanding and polishing—Fine-grit sandpaper removes marks left by supports, improving smoothness.
- Chemical smoothing—Acetone vapor treatments for ABS and other methods for different filaments help dissolve rough edges.
- Strategic support placement—Planning support contact points to minimize visible marks can improve final results.
Troubleshooting Common Support Issues
Even well-optimized supports can sometimes cause problems. Here’s how to fix them:
- Adhesion failures—Supports detaching mid-print? Increase base layers or raft strength.
- Collapsing structures—Weak supports crumbling? Raise density slightly or add interface layers.
- Excess material waste—Too much plastic used? Adjust adaptive settings to minimize unnecessary supports.
With these techniques, supports can be managed efficiently, leading to cleaner, professional-looking prints.
Buy my Comprehensive Guide to 3D Printing Slicer Software on amazon.
How to optimize CAD files for 3D printing
1. Preparing Your CAD Model for 3D Printing Learn How to optimize CAD files for 3D printing. Before slicing a CAD model for 3D printing, ensuring a clean, optimized design is crucial. A well-prepared file reduces print errors, improves structural integrity, and minimizes the need for excessive supports. Choosing the Right File Format Different file…

Best 3D Printing Software for Beginners (Free Options)
There are excellent free 3D printing software tools made specifically with beginners in mind.
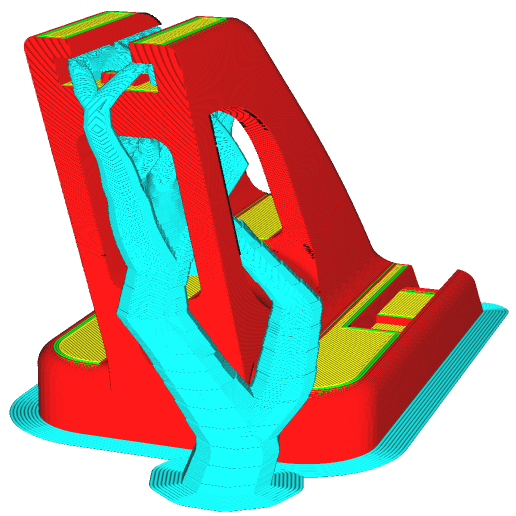
Top Plugins for Creating Custom Supports in Slicers
Discover the top plugins for creating custom supports in slicers. reduce waste, and improve print success. Fine-tune slicing for cleaner prints!
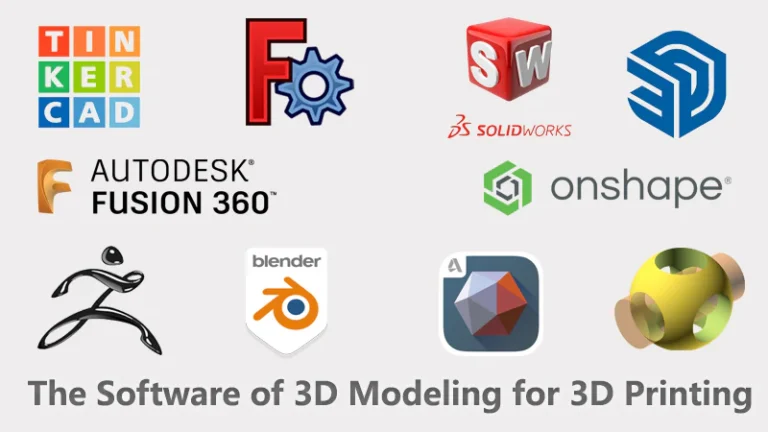
Best 3D Modeling Software for Beginners: A Comprehensive Guide
3D modeling is the backbone of digital creation—whether you’re designing prototypes for 3D printing, developing video game assets, or crafting architectural models.
Cura Slicer Beginner Tips: Mastering Your First Prints
Discover essential settings, troubleshooting tips, and advanced techniques like tree supports and optimized infill patterns to take your 3D printing to the next level.

